How do I invite new members and set their roles/permissions?
How do I bulk edit my users?
There are two ways you can add members / invite people to your account in order to access:
1. The Yay.com dashboard
2. and/or The mobile/desktop app.
Both methods will allow you to invite someone to the apps, but only one way will allow you to give them dashboard access straight away!
1. Dashboard/App Access
You can add members to an account and allow each person to have their own login credentials to increase security. You can also set access levels across differing roles so that certain members have limited access if you prefer.
A. Creating a Login
1. Log into the Yay.com Dashboard and navigate to the Account area.
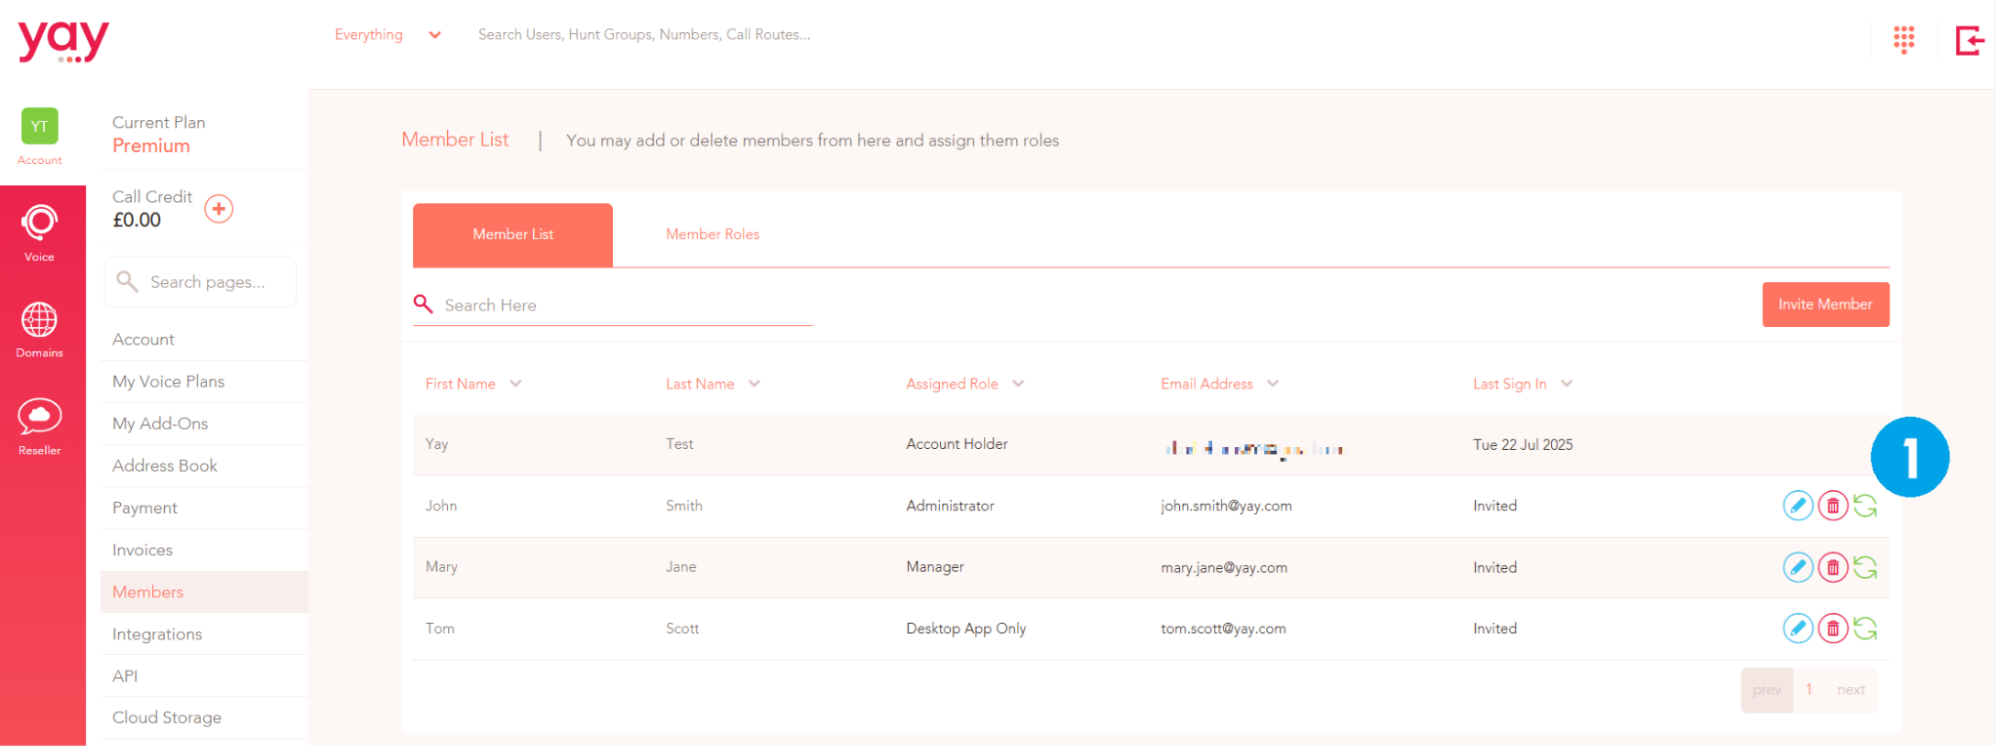
2. Select Members to view everyone that currently has a login.
3. Click the Invite Member button in the top right-hand corner to create a new login.
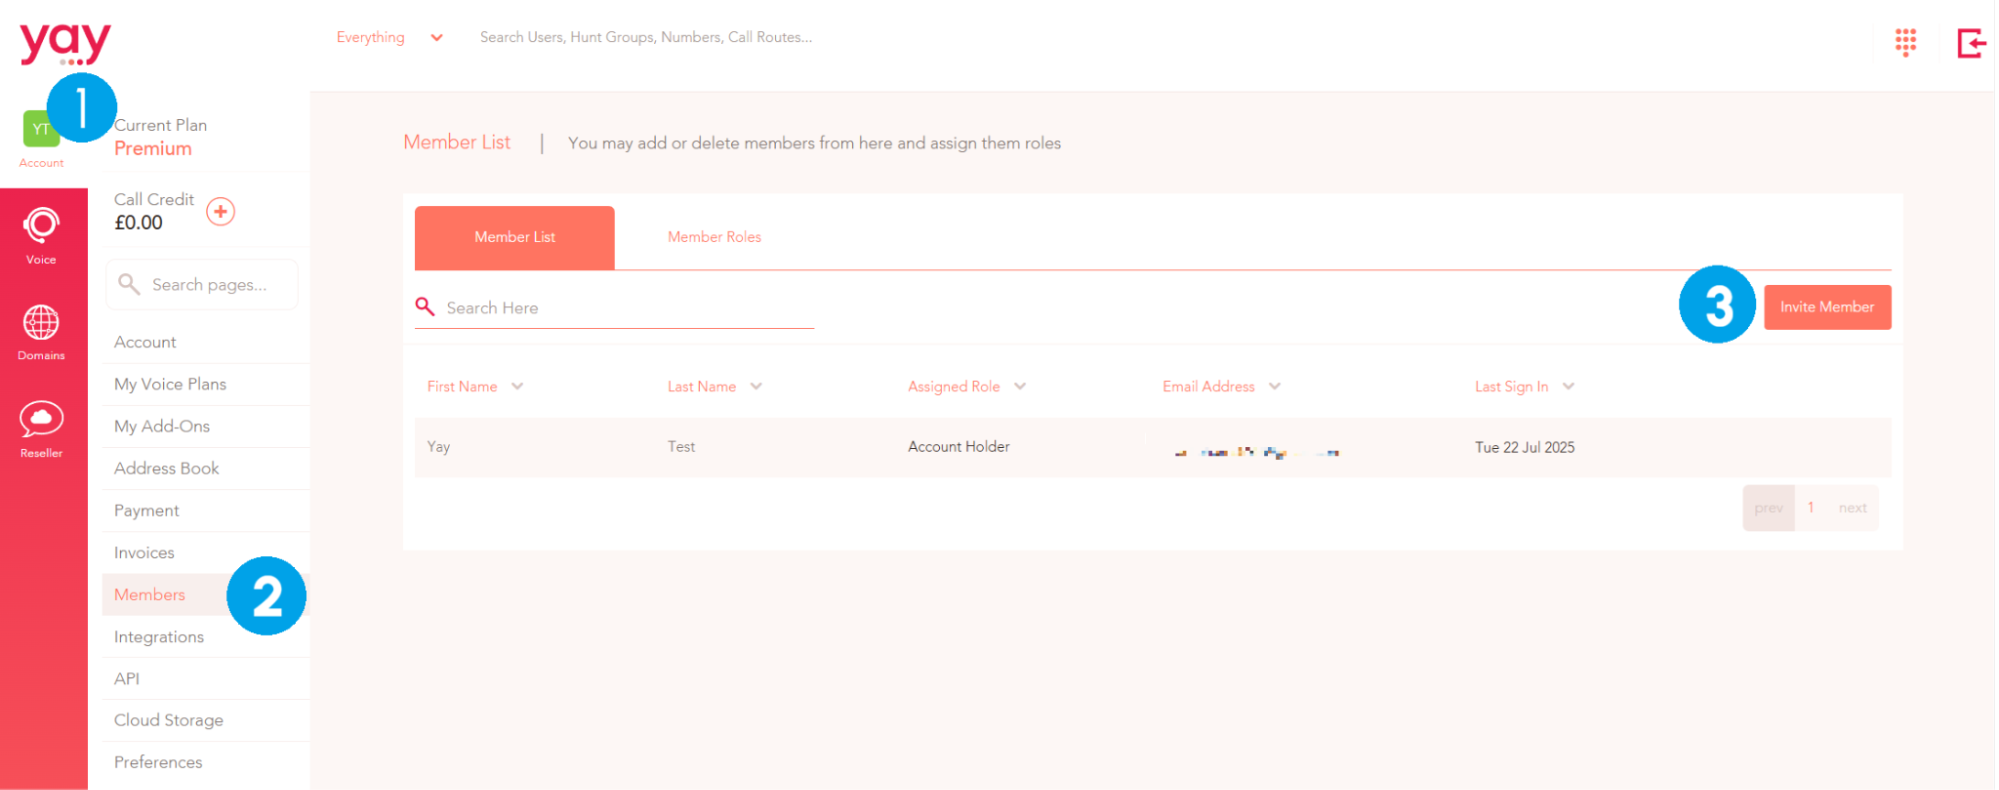
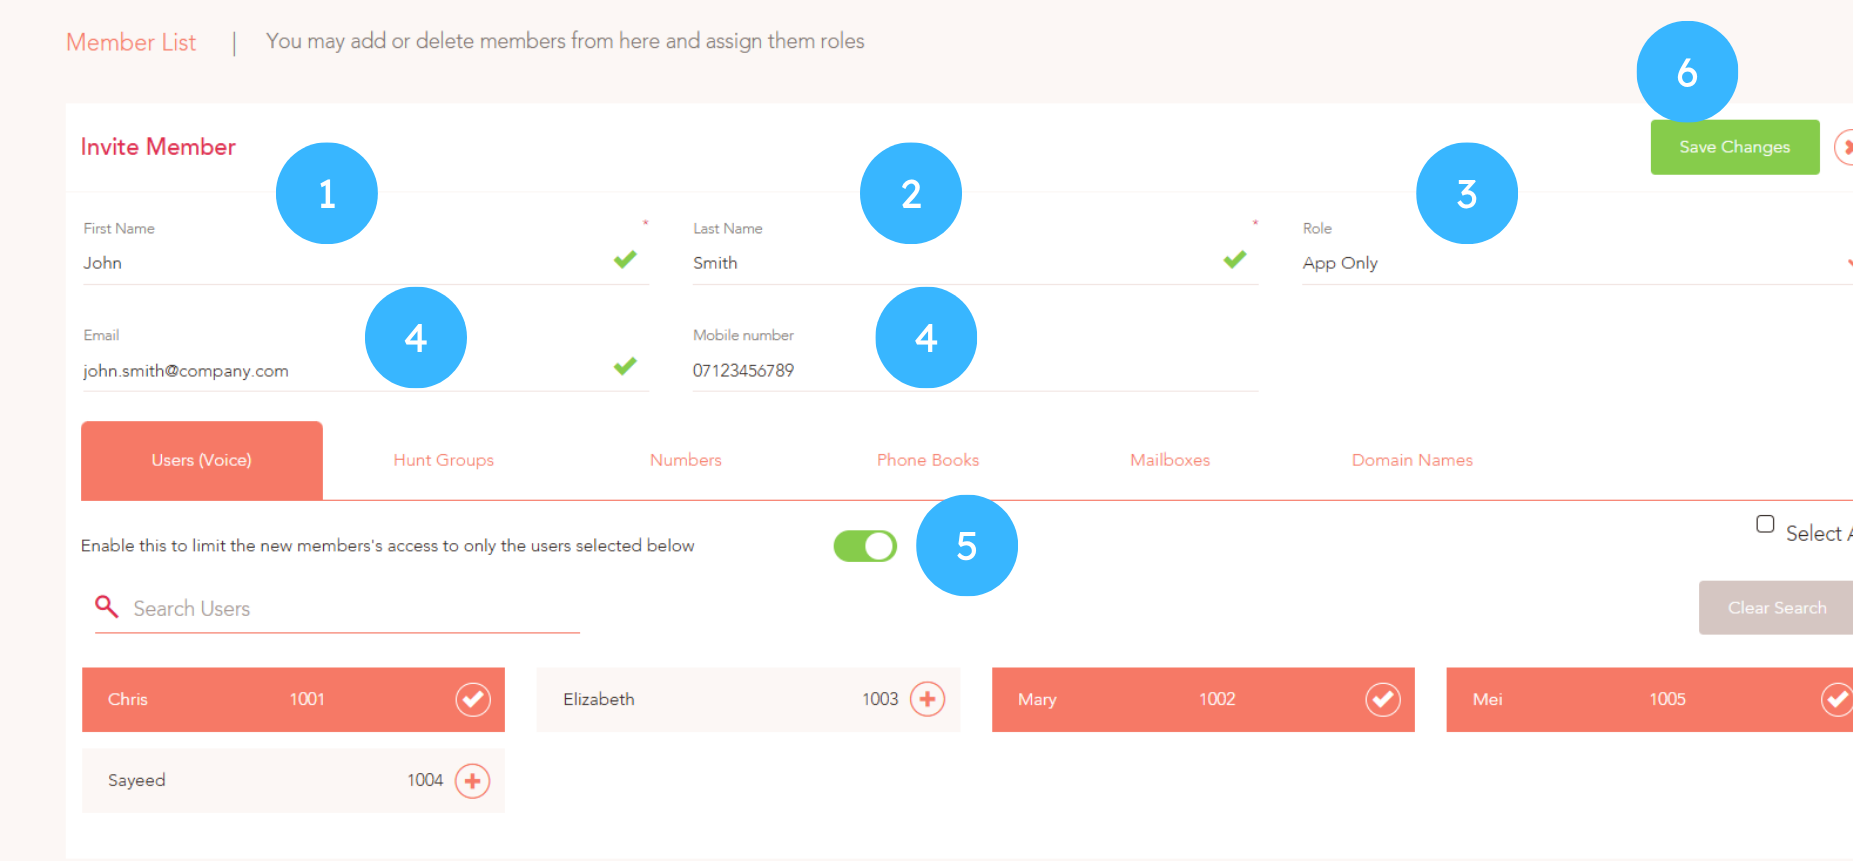
See the screenshot below to create a new Member:
1. Enter the First Name for the new member.
2. Enter the Last Name for the new member.
3. Assign a Role to the new member (see Section B on how to create and edit Member Roles).
4. Enter the Email Address and/or enter the Mobile Number for the new member.
5. Below the member’s details there is a series of tabs that allow you to be more granular with regards to setting a member’s access levels.
In the example below, the new member is given the Administrator role which allows them access to all areas of the Dashboard (all Users, all Hunt Groups, all Numbers etc)
You can use the tabs to enable/disable access to specific Users, Hunt Groups, Numbers etc. by clicking on them. In this example, the member has access to Users, but they are unable to view or edit Elizabeth and Sayeed. The users that this member can access are shown with a ‘tick’ next to their name.
You can click the User to enable/disable access for the member.
6. Click Save Changes when complete.
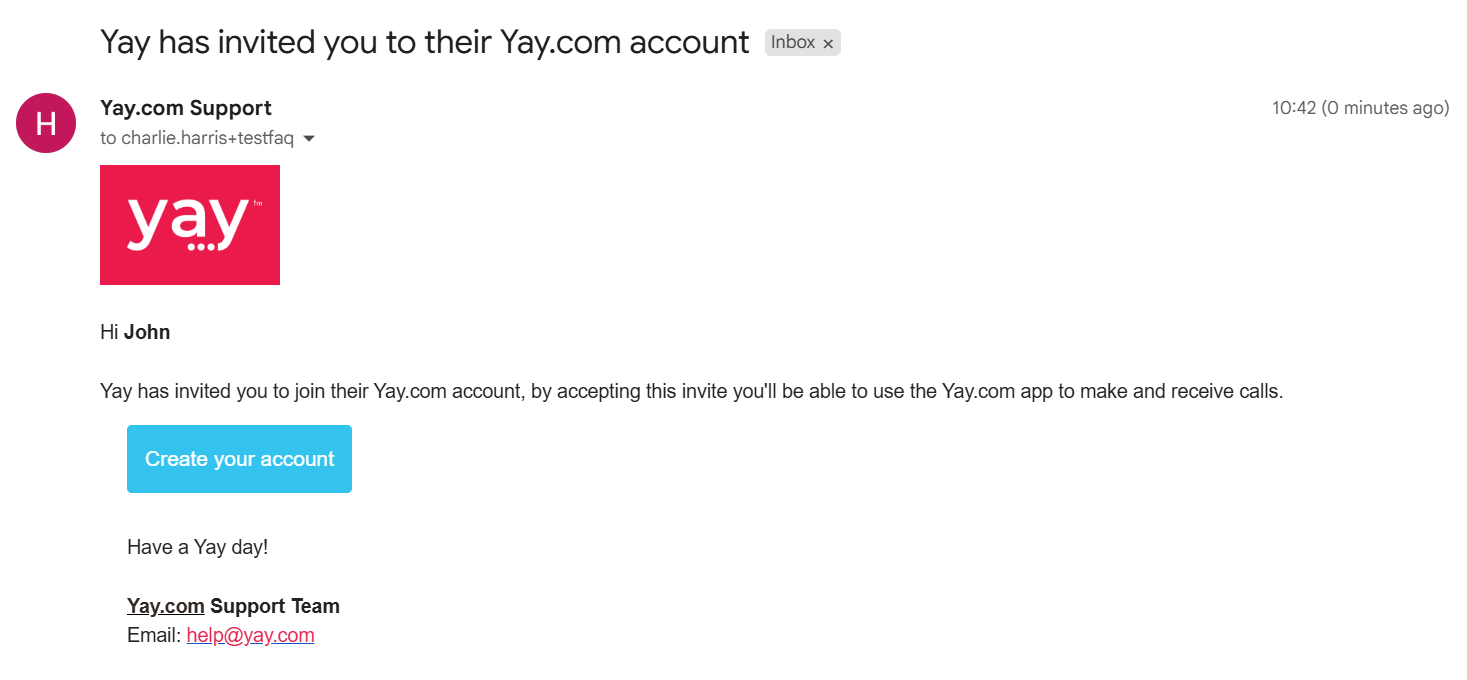
Once you create a new member, they will receive a welcome email. The member needs to click the Activate Account button in the email.
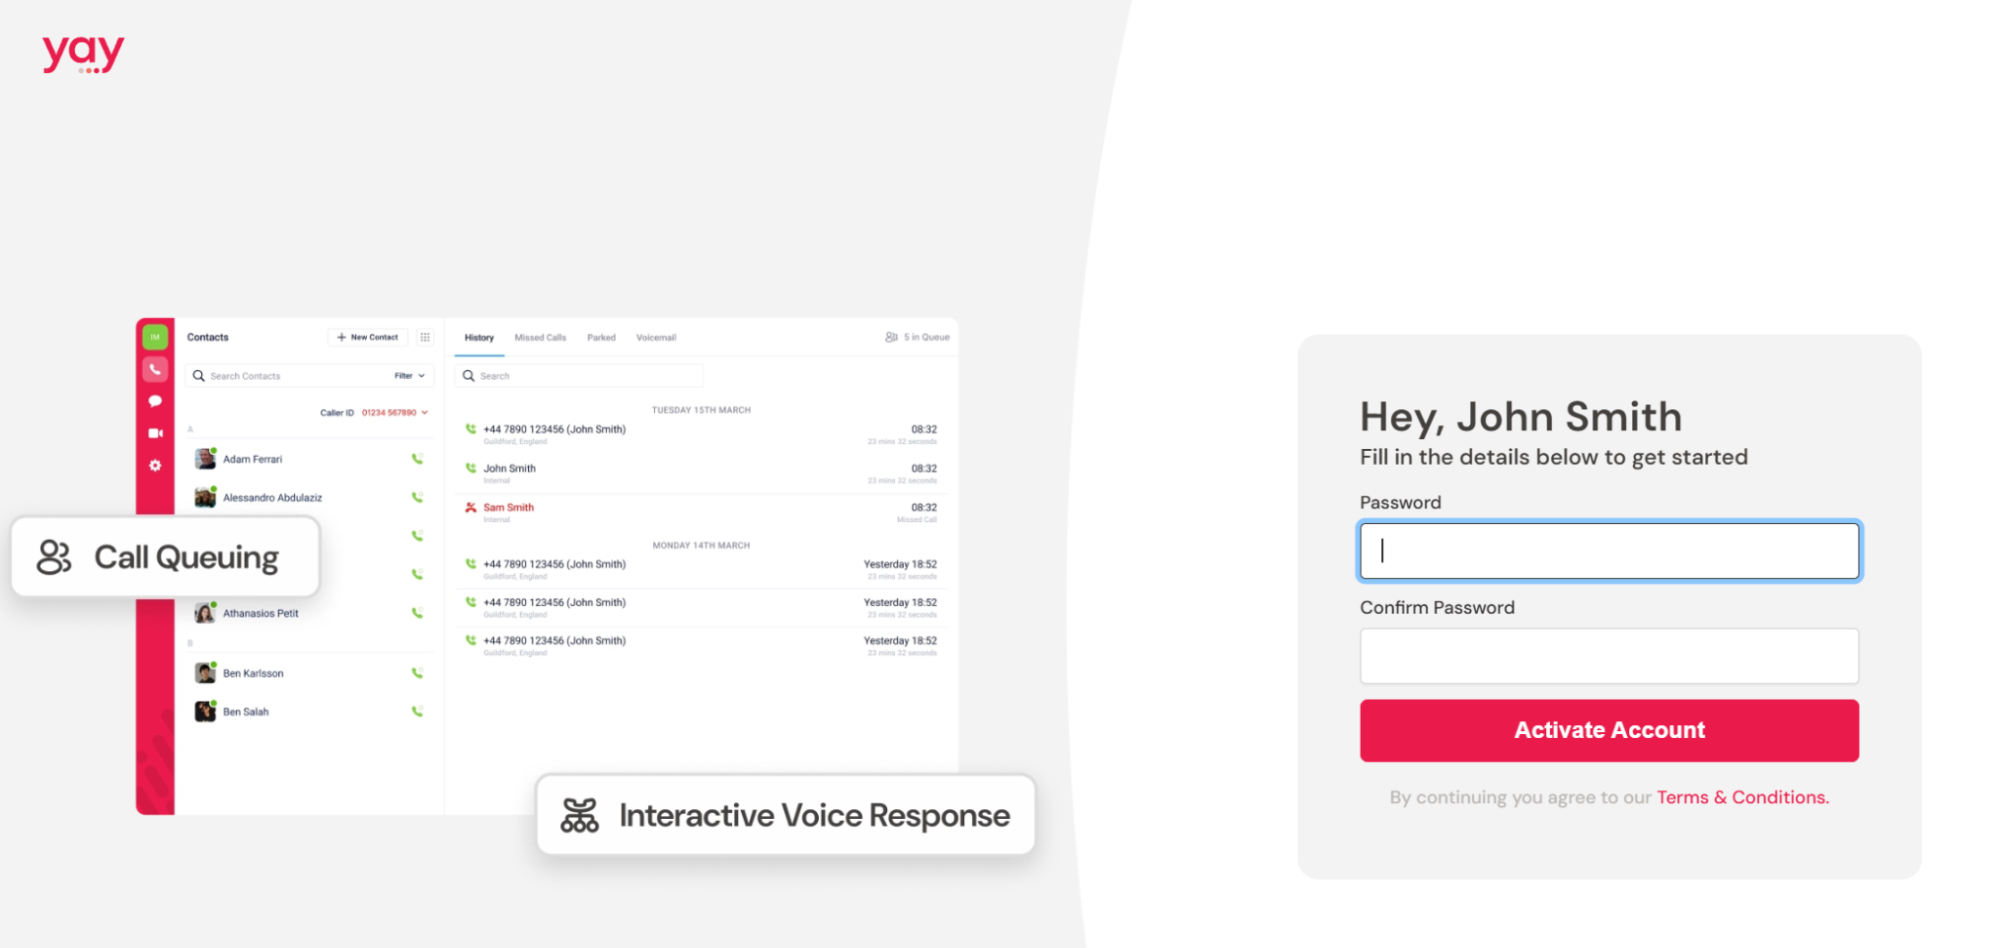
The new member is then prompted to create a password which they will use to log into the Dashboard. When done, they must click Activate Account.
That's it! The new login has now been created.
1. The activation emails can be resent by clicking on the green ‘refresh’ icon on the Members screen of the portal. This is a useful option if somebody has forgotten their password.
B. Creating Member Roles
Member roles are important for security. Each role provides different levels of access within the Dashboard and you can decide which areas each role can access. There are several pre-configured roles in the system which you can assign. You can also create new roles from scratch.
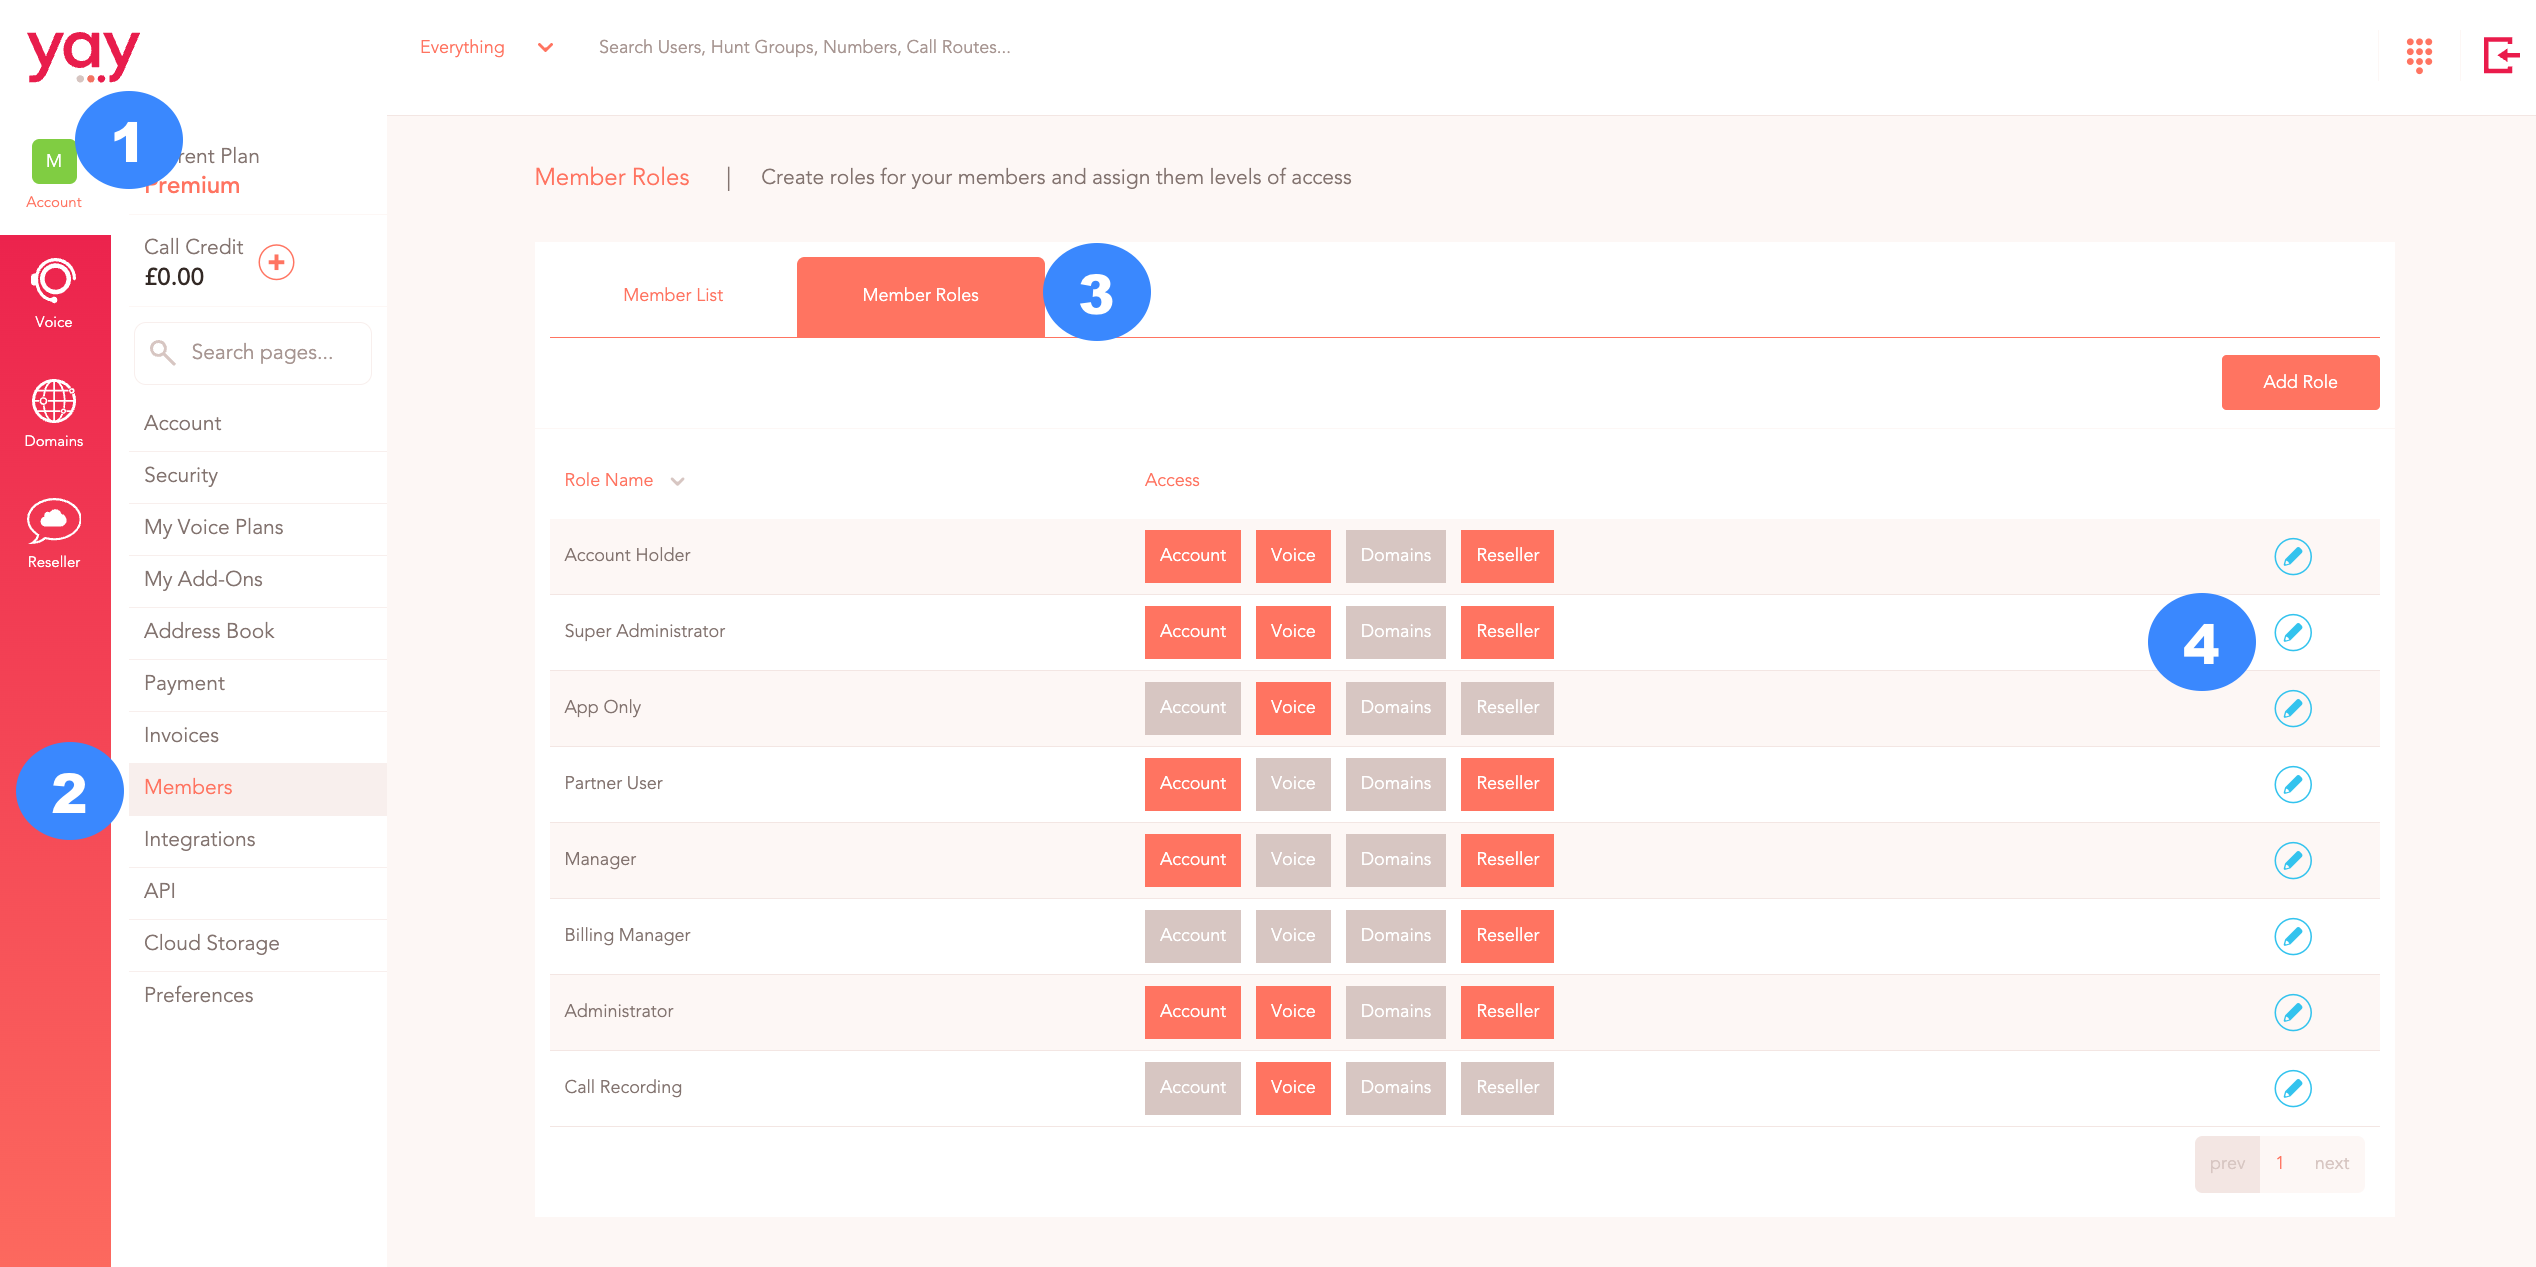
1. To view member roles, go to Account from the menu on the left
2. Head to the Members section
3. Click on the Member Roles tab
4. You will be presented with a list of Member Roles. To view or edit the access levels for a role, click on the blue pencil Edit icon to the right-hand side of the role.
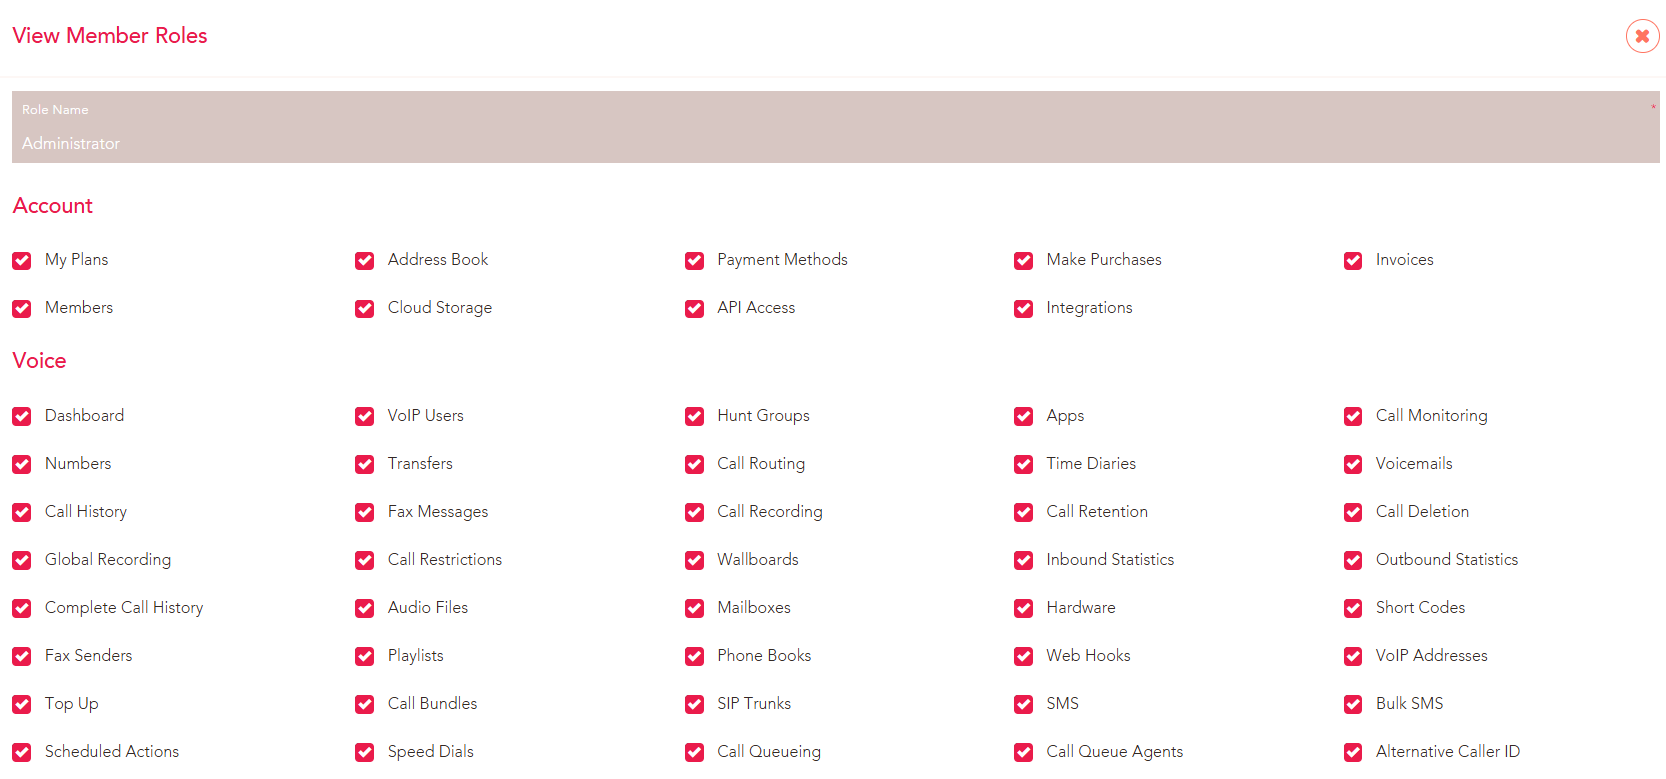
The different areas of the Dashboard will be listed and a tick will appear in the area that this chosen role can access. The screenshot below is for the Super Administrator role and the Administrator has access to all areas of the Dashboard. Click here to see a breakdown of some of our preset roles and their permissions.
When editing a member role, you just need to ensure that a tick is in the relevant box to grant access to that area of the Dashboard for anyone assigned this role.
1. To create a new role, click the Add Role button in the top-right corner of the Member Roles area of the Dashboard.
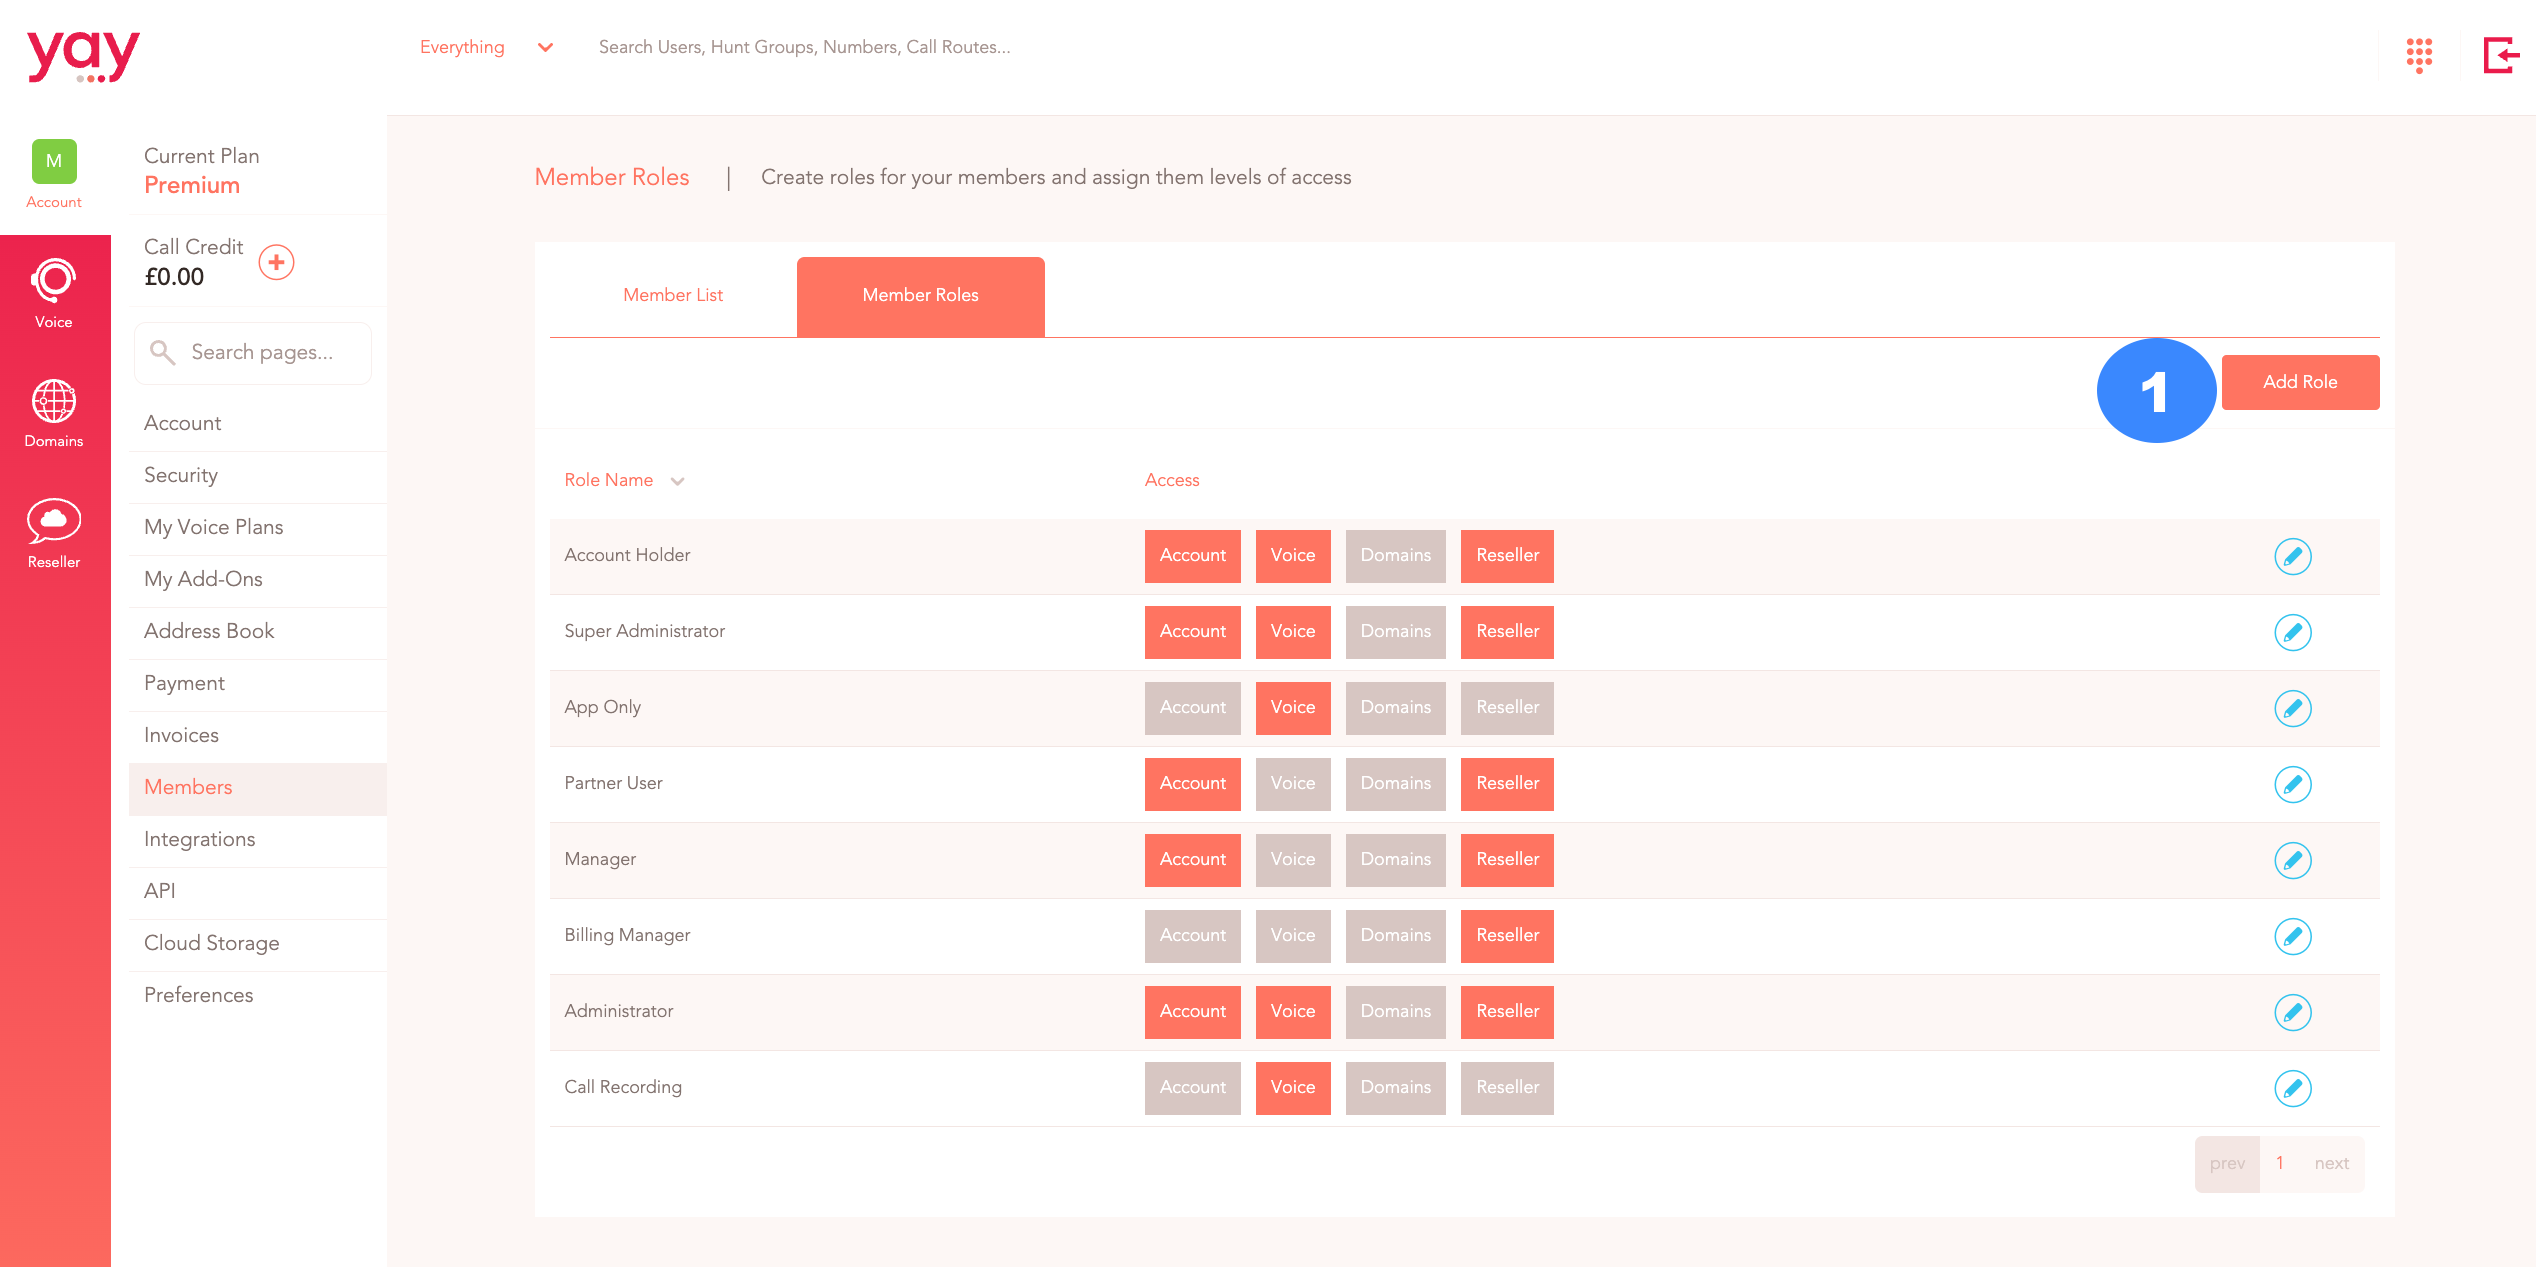
Give the new role a name, tick the areas that you want this role to have access to and then Save Changes.
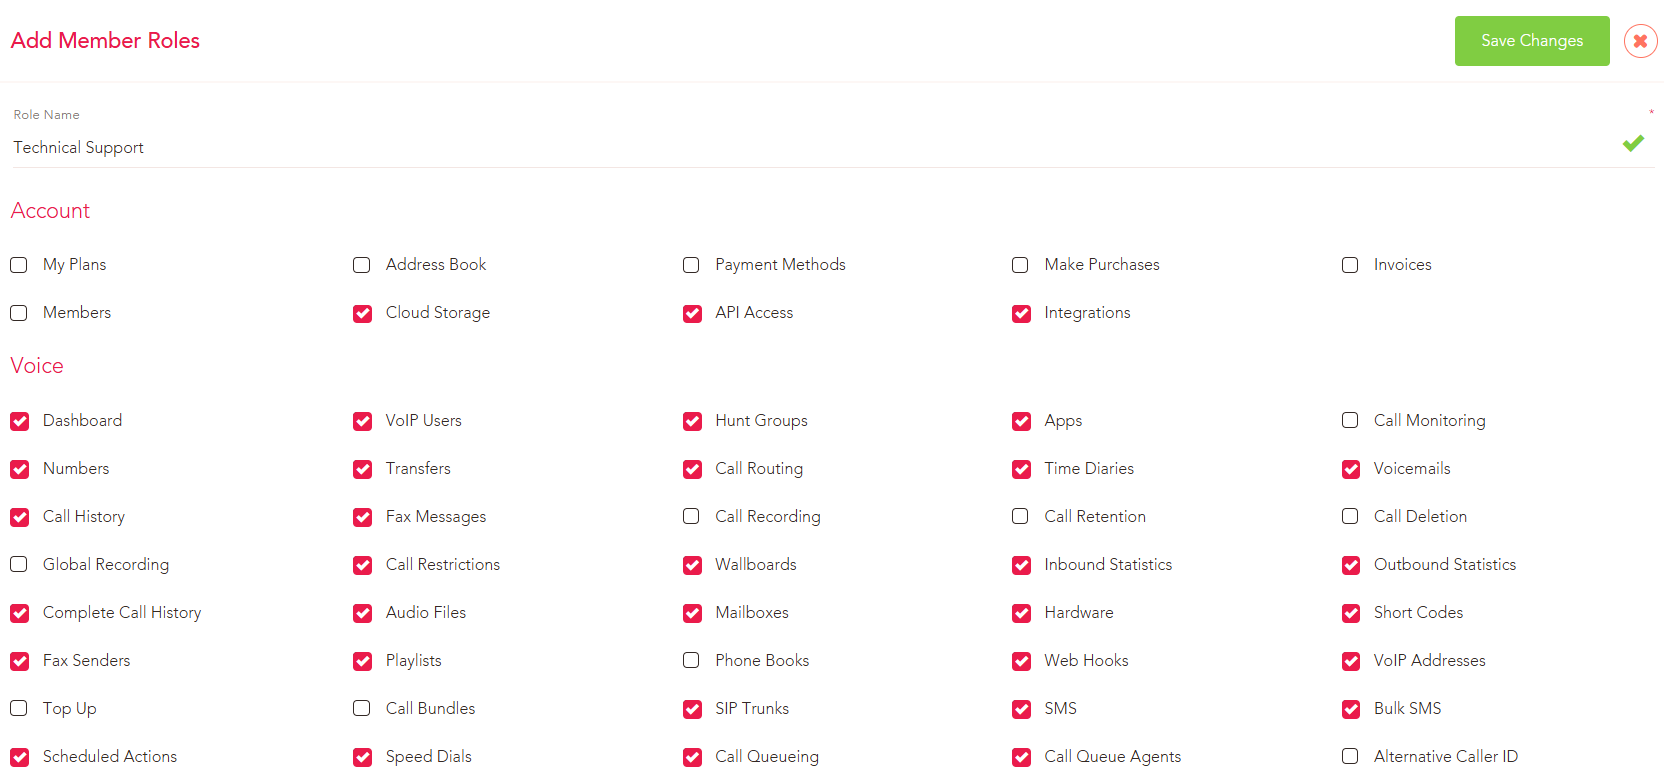
The new role will then be created and you will be able to assign this role to new and existing members.
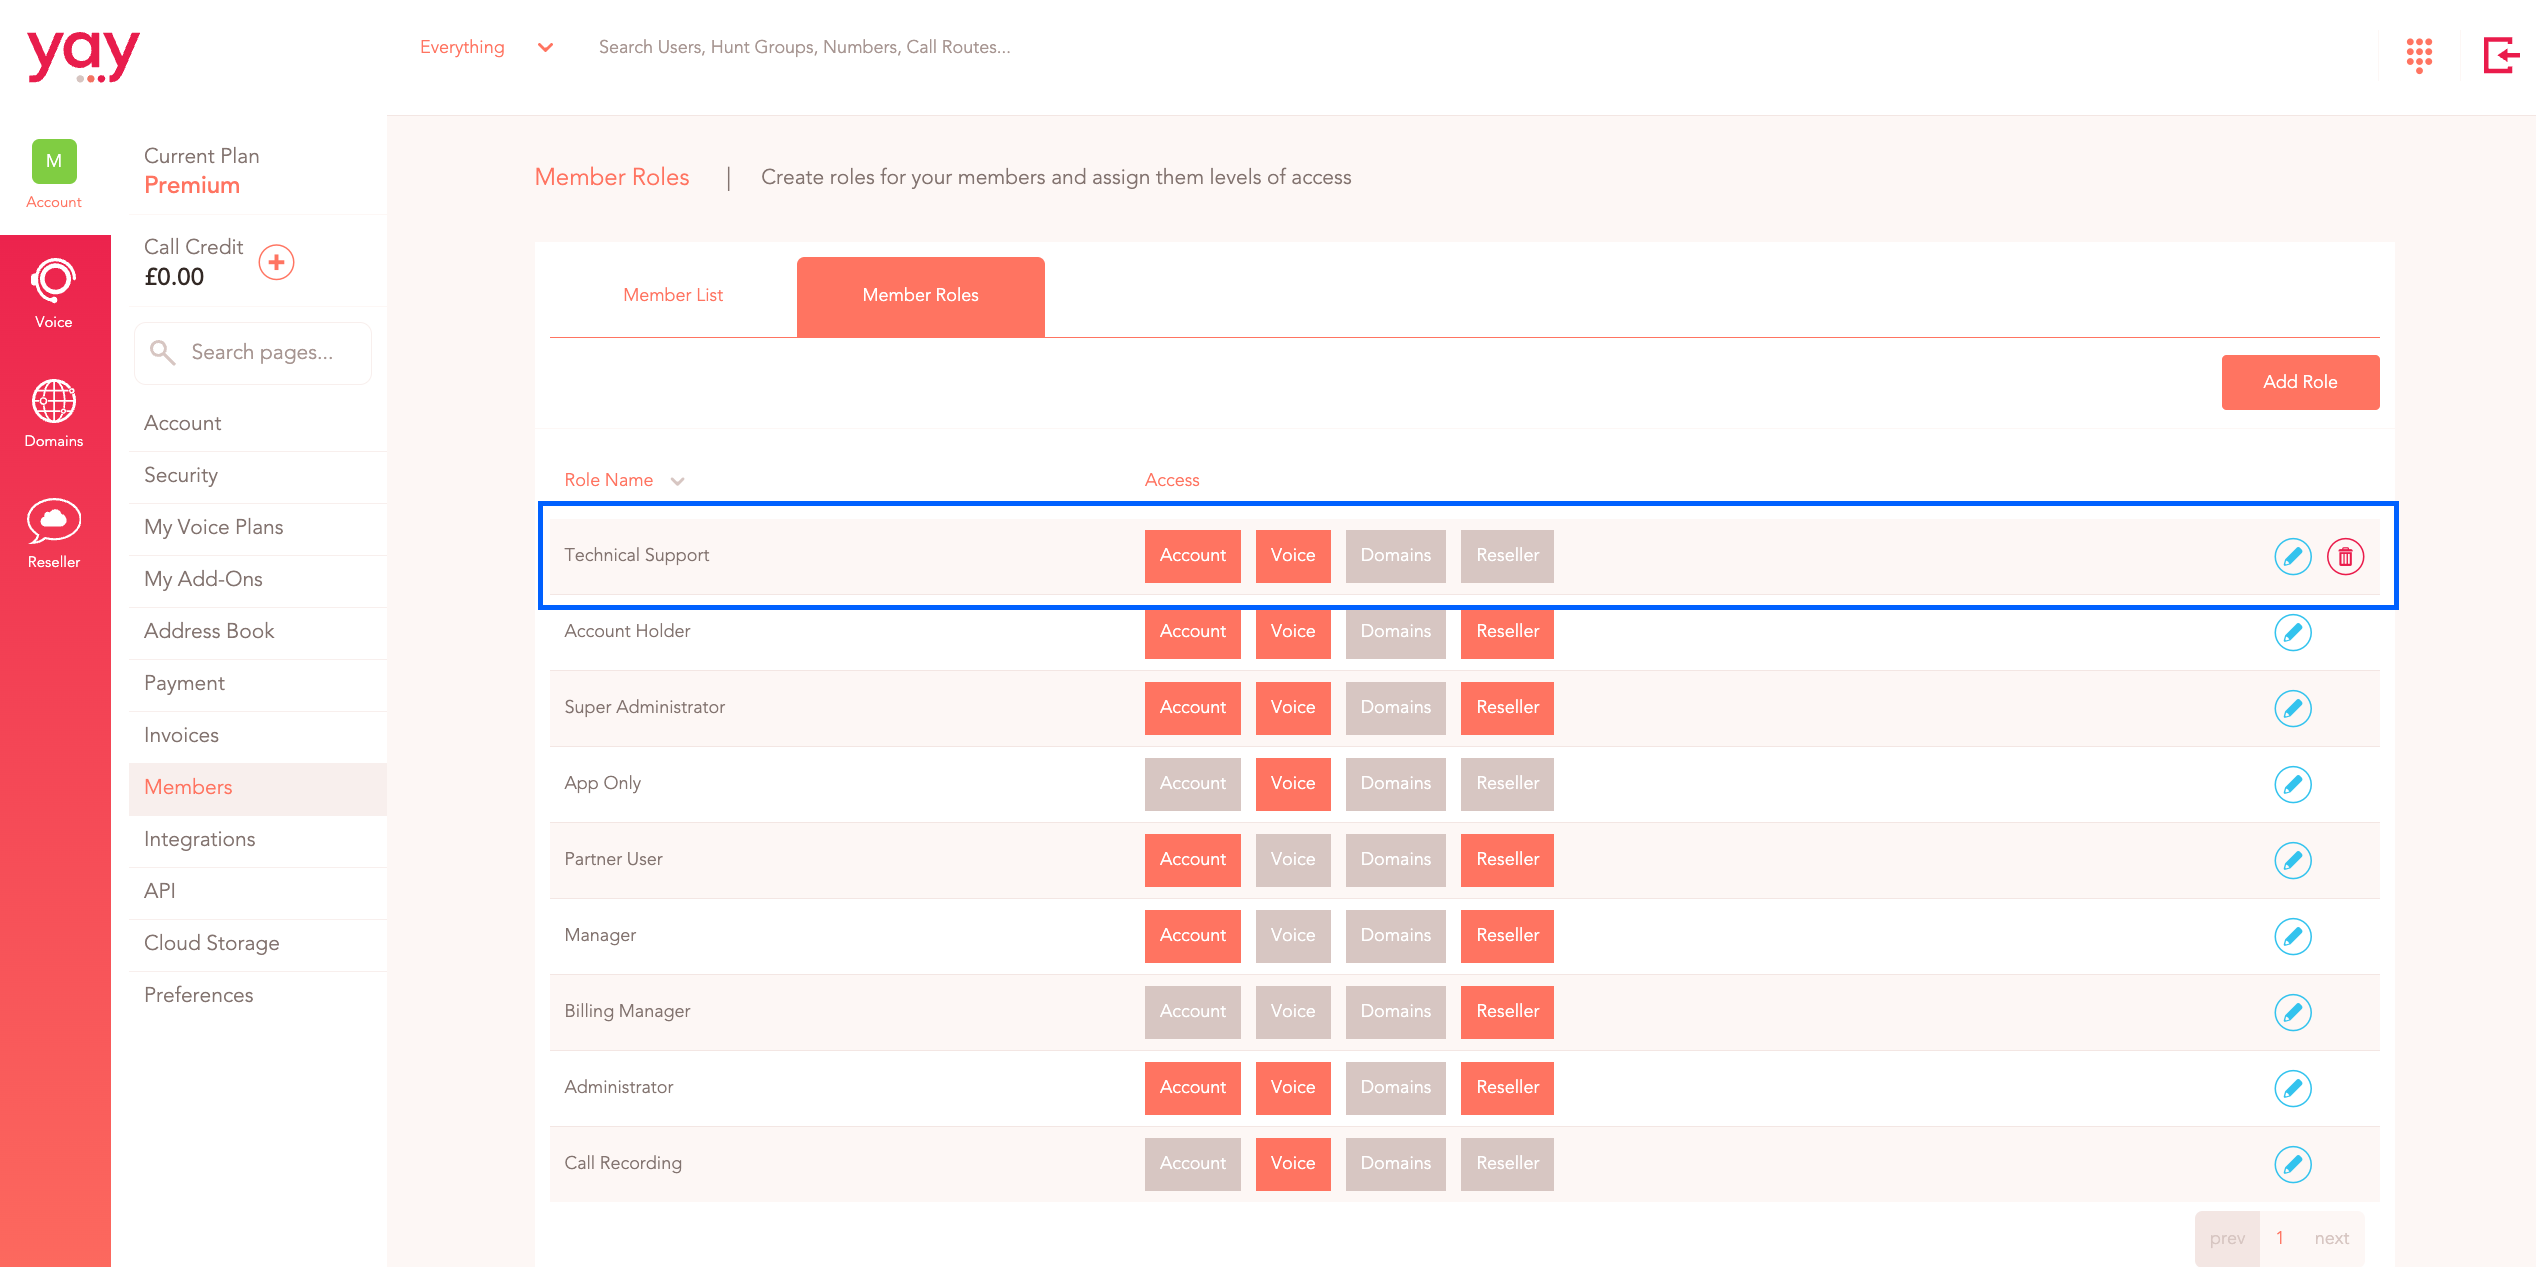
2. App Access Only
If you are inviting someone just to access one user, you can do so under the App Registration page of that user!
To access this, head to Voice > Users > [edit your user] > App Registration in the Yay dashboard.
A. Inviting people to the user:
To invite someone to have access to this user, click the Invite Member button in the top right.
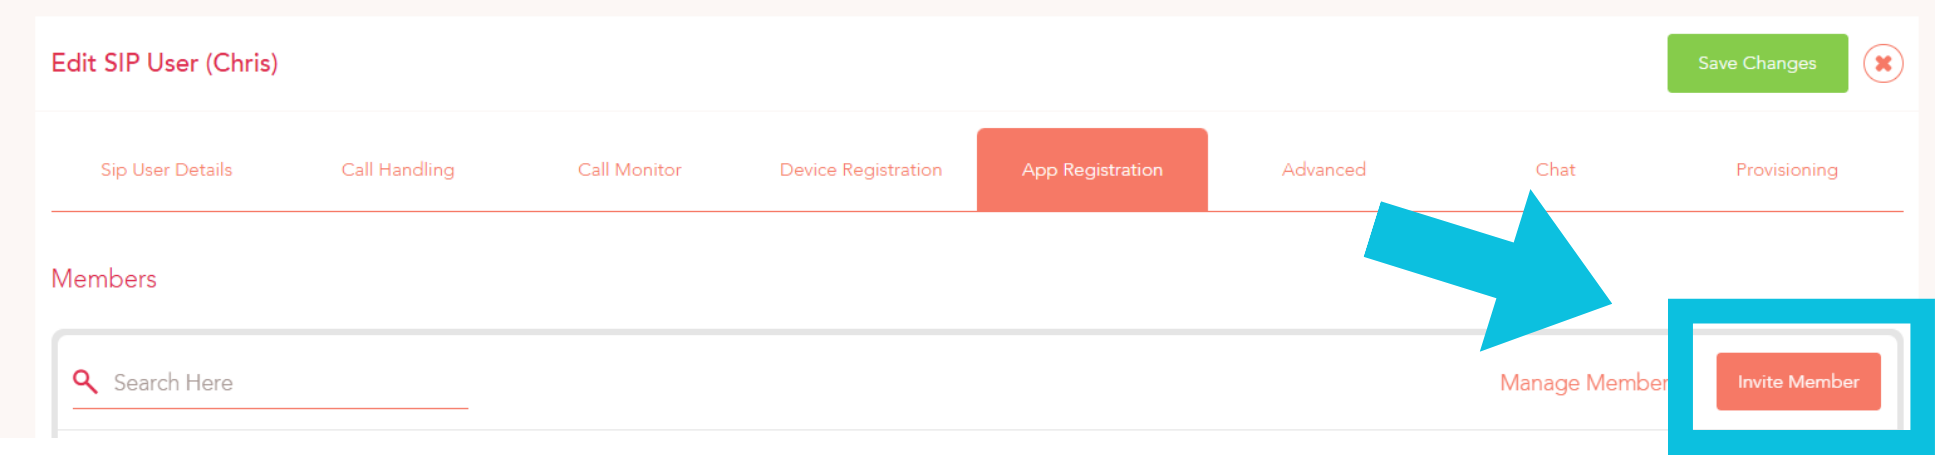
You will then be prompted to enter:
1. Their First Name
2. Their Last Name
3. Either (a) Their Email Address and/or (b) Their Phone Number
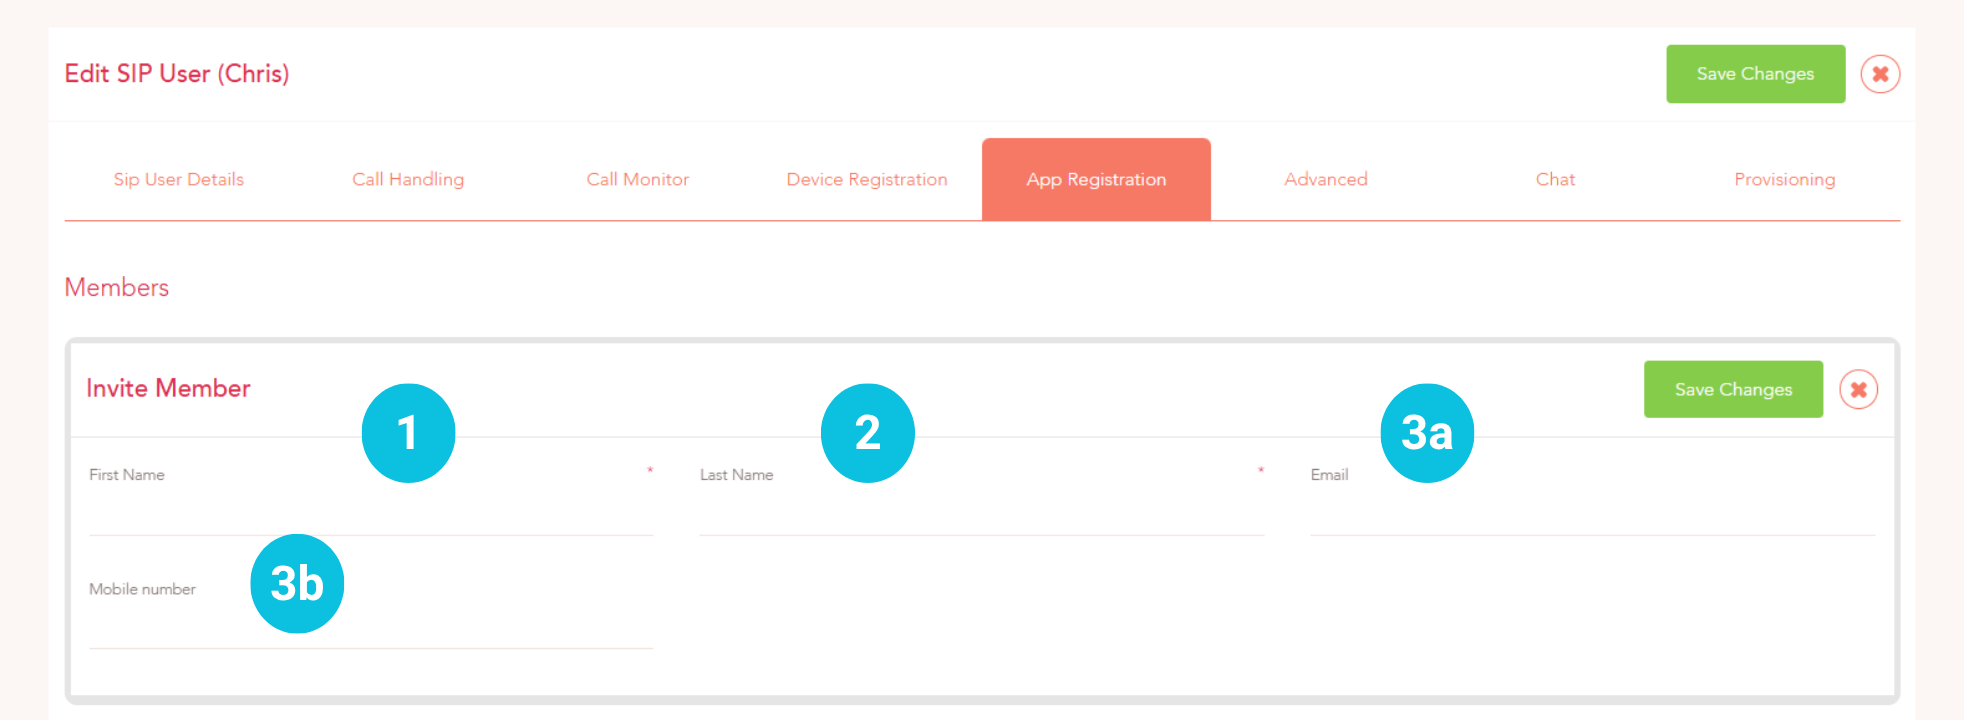
Depending on how you invited them, they will receive different notifications:
- If you enter an email address, they will receive an email prompting them to create a password for their login
- If you enter a mobile number, they will receive an SMS prompting them to download the Yay app
Once you click the Save Changes button, a member with these details will be created and the notification will be sent out, and they can set up their user on the Yay.com application!
B. Managing Access to the user:
On the App Registration page, you will see a list of all the members in the account. Those with access to the user will be at the top of the list, and those without will be at the bottom.
The Padlock Symbol on the right denotes whether or not that member has access to view or log into this user.
1. The Locked padlock symbol means that this member does not have access to the user. If you have the permission to do so, you can click on this locked padlock symbol and this will give that member access to this user.
2. The Unlocked padlock symbol means that this member does have access to the user already. If you have the permission to do so, you can click on this unlocked padlock symbol and this will remove that member’s access to this user.
3. The Faded Unlocked padlock symbol means this member either does have access to the user due to their member role, and this access cannot be removed without their member role being changed (e.g. Account Holder/Super Administrator), or they don't have access to any users on the account in the first place
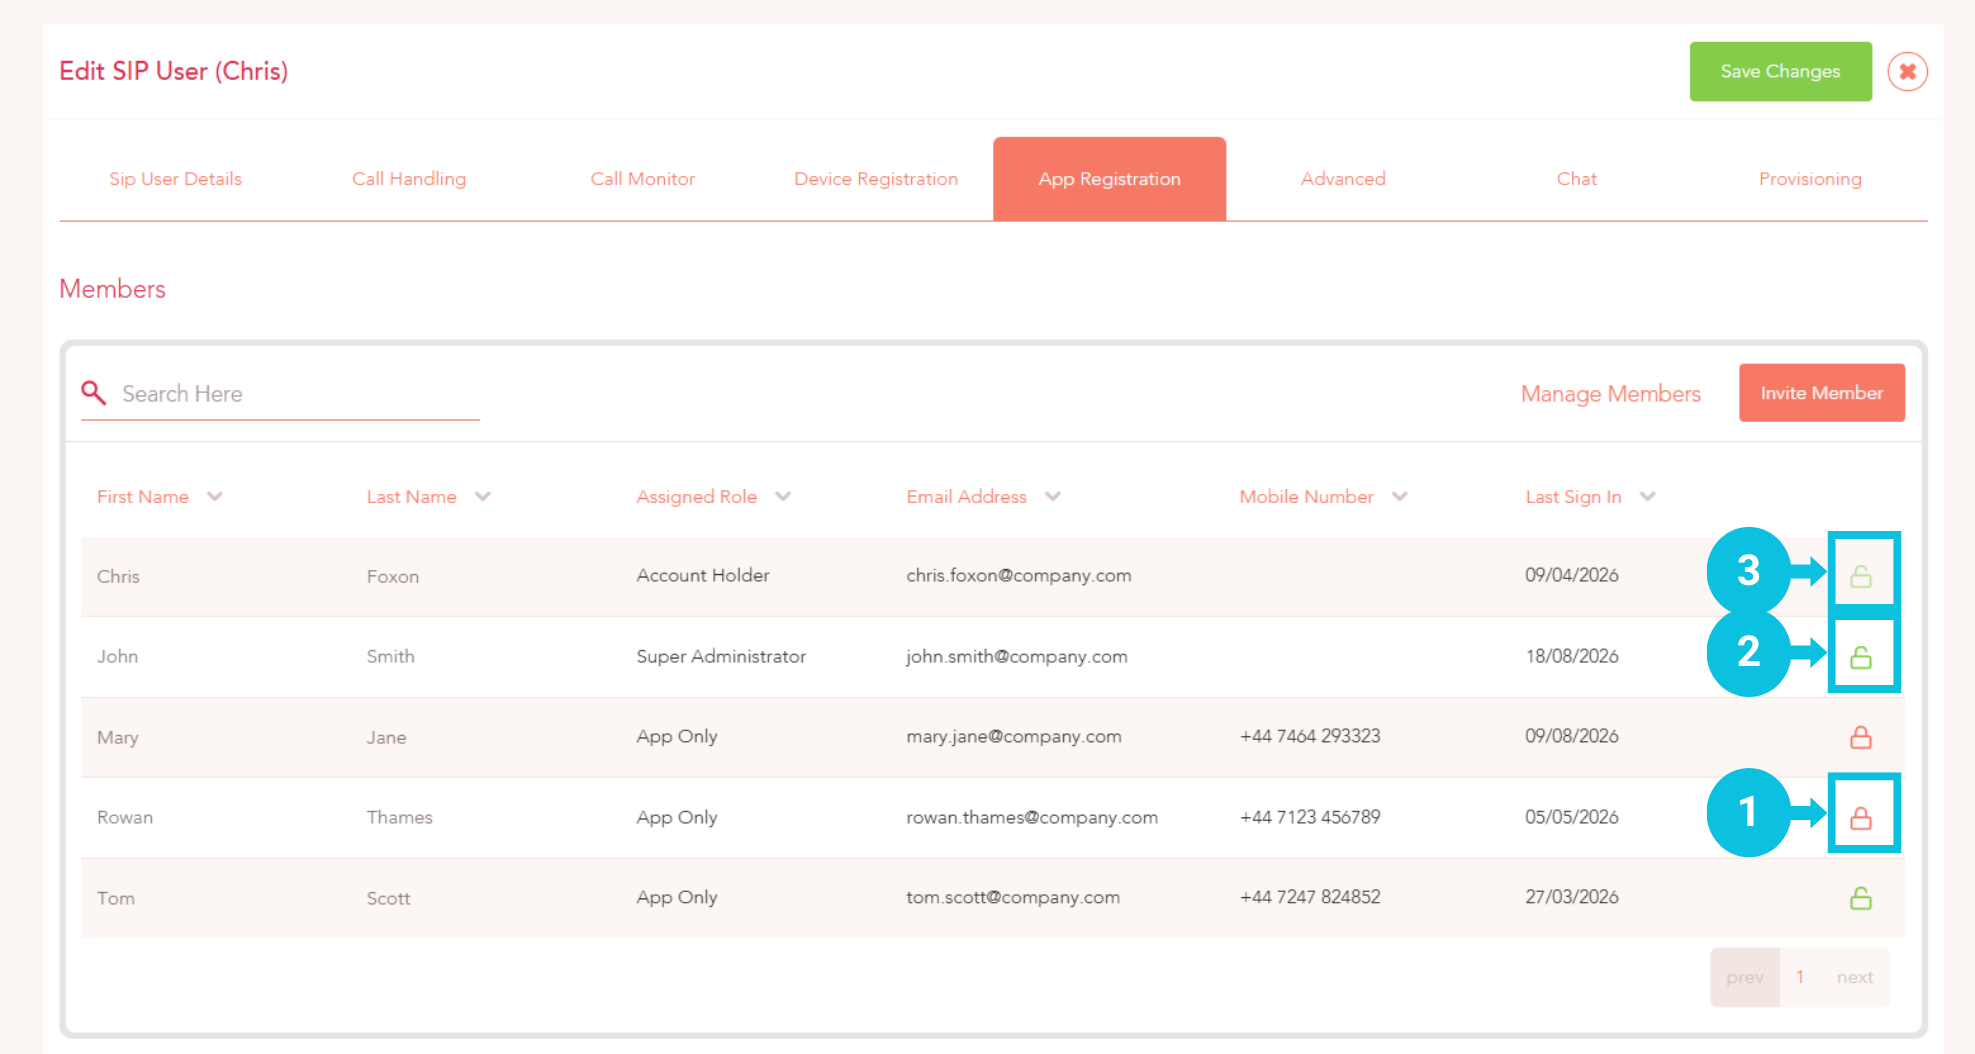
To edit the details of a member or remove them from the account, click the Manage Members button and you will be brought to the Account > Members > Member List page, where you can edit and remove members as needed!